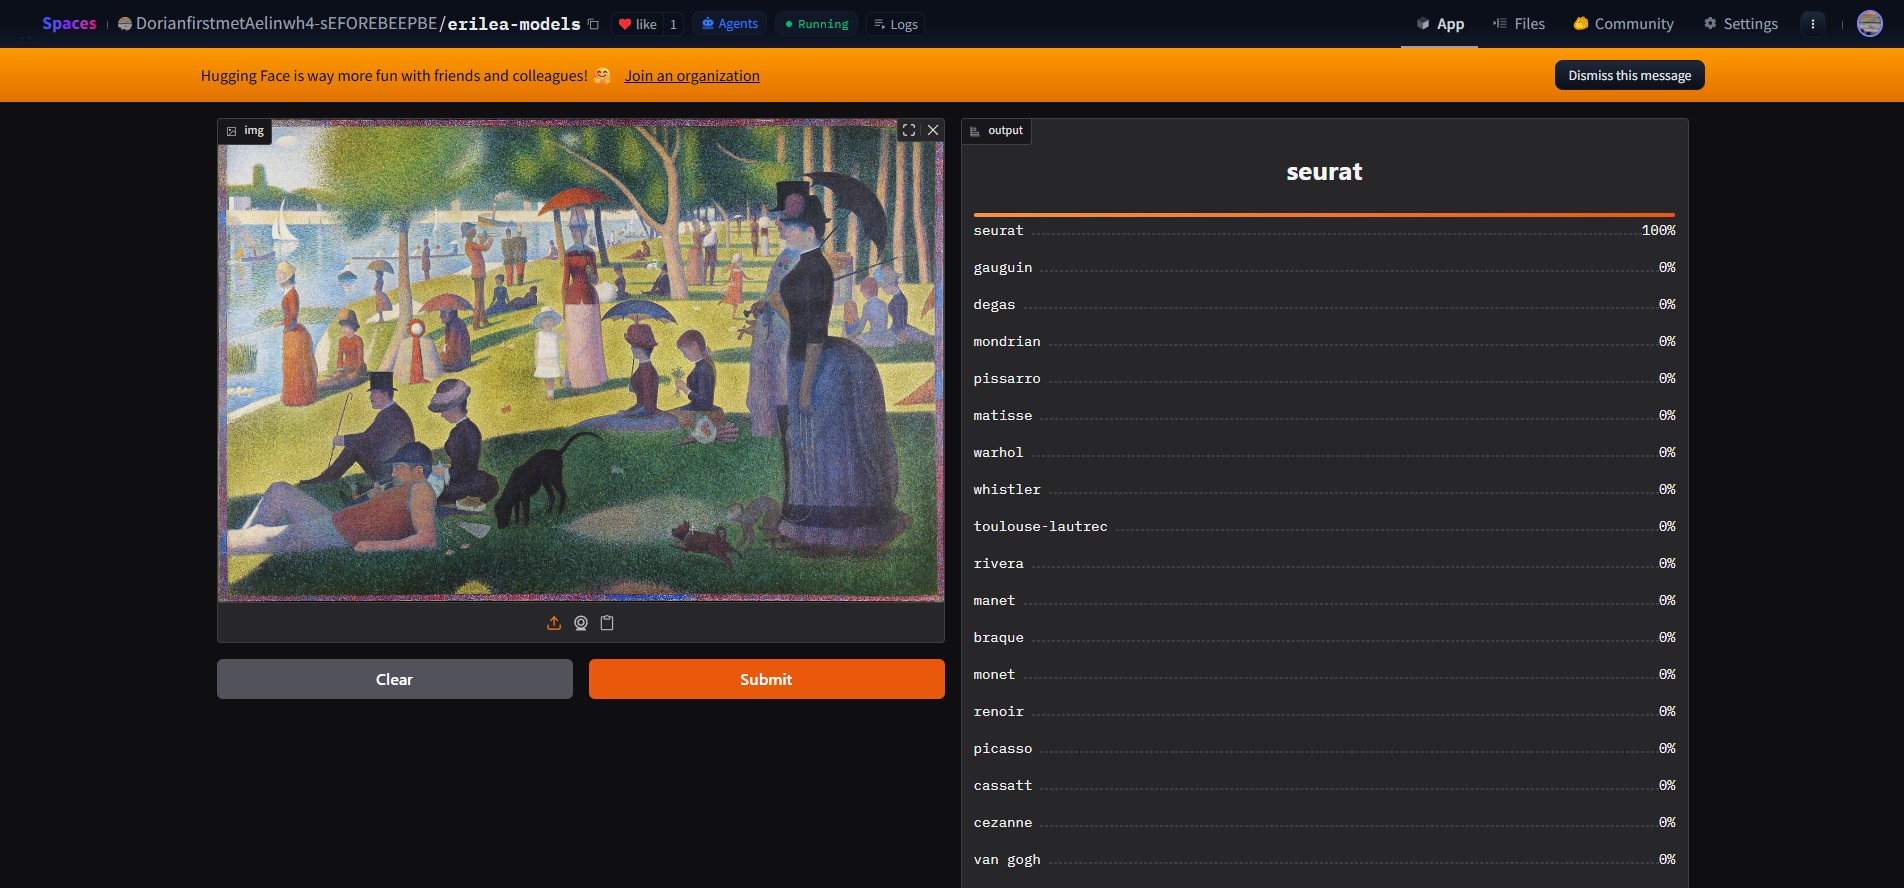
In this blog post, I will provide a comprehensive overview of the Ashryver V1 Painting Classifier, a classification model designed to identify paintings by 20 different Impressionistic artists. It is trained on the fast.ai library, utilizes the resnet50 model, and contains 400 training images per artist for a total of approximately 8,000 items.
Since this is a relatively entry-level model (no complex ML techniques or neural networks; just a simple fast.ai learner implementation), this will be a pretty short post. I will include code snippest throughout the post so you can see portions of the model architecture.
The Training Process
I used the fast.ai foundational framework for this project, moving away from the clunky and cumbersome Tensorflow libraries I had been familiar with before. fast.ai is just an upper layer of Pytorch, which is the latest and most efficient machine learning library. I was blown away by how easy it is to instantly create and train a deep learning model; all it takes is just a few different code cells and some DataBlocks. After data preparation was completed, here is the entirety of the code that I used to get to the training stage of the model:
# Check to see if any of the images failed to download properly
failed = verify_images(get_image_files(painting_data_updated))
# verify_images returns a list (or L) of file paths that failed verification
for f in failed:
    try:
        Path(f).unlink()
    except Exception as e:
        print(f'Could not remove {f}: {e}')
print(f'Removed {len(failed)} failed images.')

# Create the Datablock
dls = DataBlock(
    blocks=(ImageBlock, CategoryBlock),
    get_items=get_image_files,
    splitter=RandomSplitter(valid_pct=0.2, seed=42), # split 20% of the data off for validation
    get_y=parent_label,
    item_tfms=[Resize(448, method='squish')]
).dataloaders(painting_data_updated, bs=32)

dls.show_batch(max_n=20) # show a sample of 20 images that the model will be trained upon

# Train the resnet50 model
learn = vision_learner(dls, resnet50, metrics=error_rate)
learn.fine_tune(4) # train for 4 epochs
Although the Ashryver model’s dataset was modestly sized (8,000 images versus hundreds of thousands for some other models), it ended up doing the job very well. I did have to go through several training runs to get the accuracy above its initial poor score of 0.60, but things turned out well in the end.
At first I was using the resnet34 model, which was rumored to be exceptionally good at classifying paintings. This is one of PyTorch’s pretrained models, and it’s called resnet34 because it has 34 layers in its convolutional neural network. This worked out okay, but generally you want to be achieving higher than 0.60 validation accuracy for a classification model. So I decided to switch to the resnet50 model, which prefers an image size of 224 x 224 pixels and has 50 layers in its CNN. This model performed substantially better, first achieving an accuracy of 0.77 on the initial 1800-image dataset, and then 0.89 on the final 2700-image dataset.
The Evaluation Process
Of course, I needed to obtain a full classification report on the model before releasing it anywhere. I was previously unfamiliar with how to do this in fast.ai. However, some quick googling revealed that it’s actually not that complicated, and similar in many ways to the process with Tensorflow. Here’s the code I used to check the model’s results and then save the latest version:
learn = load_learner('painting_classifier_resnet50_400perartist_224x224.pkl') # load the trained model

img = PILImage.create('painting-test-5.jpg') # feed in the test image

pred_label, pred_idx, all_probs = learn.predict(img)
formatted_pred = pred_label.capitalize() # capitalize the artist's name in the prediction

print(f"This is a {formatted_pred} painting.\n============================\nAll Probabilities")
for class_name, probability in zip(learn.dls.vocab, all_probs):
    prob_val = probability * 100 # format to a percentage
    if class_name == pred_label:
            print(f"\033[1;32m{class_name}: {prob_val:.2f}%\033[0m") # output the predicted label as bold and green
    else:
        print(f"{class_name}: {prob_val:.2f}%")
show_image(img)

# Save the latest model version
learn.export('painting_classifier_resnet50_newdata_224x224.pkl')
All in all, it took about two and a half weeks before I got a model that I was satisfied with. Since my setup involved using remote Kaggle Jupyter Servers with more GPU power to do training runs, I did have to take more time each session to navigate to Kaggle, connect it to VS Code where I was working, and re-download any environment files. However, my laptop definitely would not have been able to perform such intense training in a timely manner.
Model Release (HuggingFace, Gradio)
Once the training and evaluation was done, I moved onto the production process. I had some initial difficulties with HuggingFace in setting up a space for the model; this was due to runtime errors and issues with the way I’d set up the GitHub repository that pushed to the space. HuggingFace demands a very complicated system of API keys and has stringent restrictions on file sizes, so I had to battle those for a while as I moved the .pkl model files into the space.
Now, the painting classifier is successfully running in a HuggingFace space, which I’ve set up and named ‘erilea-models’ to embody the fictional continent of Erilea. This space behaves somewhat like a GitHub repository, which you can clone down to your computer to add code and add models that can be represented using HuggingFace’s UI. All I had to do with this repository was drop in my pre-trained model in the form of a PKL file, and then call that file in an app.py script to make predictions using a simple notebook. That notebook then launched a Gradio interface (essentially what creates the graphical UI you see on the space itself) that allowed the model to make live predictions.
Below is the entirety of the app.py script I used to get the model to output live predictions. Again, very simple:
from fastai.vision.all import *
import gradio as gr

learn = load_learner('models/painting_classifier_resnet50_400perartist_224x224.pkl') # import model from pkl file

# NOTE: HuggingFace has changed their policy in the 2 months since I set up this space,
# and they now demand that free-tier users use the ZeroGPU mode instead of the Basic CPU tier
# for some unknown reason. (As a result, you can now only have 2 free spaces).
# You will need to create a dummy function that calls @spaces.GPU, otherwise a runtime error will be thrown.

# Setup our image classification function
categories = list(learn.dls.vocab)
def classify_image(img):
    if img is None:
        return {}
    img_pil = PILImage.create(img)
    pred, idx, probs = learn.predict(img_pil)
    return dict(zip(categories, map(float, probs)))

# Launch a local URL via Gradio
image = gr.Image()
label = gr.Label()
examples = ['images/painting-test-1.jpg', 'images/painting-test-2.png', 'images/painting-test-7.png', 'images/painting-test-8.jpg', 'images/painting-test-11.jpg'] # default images that the user can choose in the UI
intf = gr.Interface(
    fn=classify_image,
    inputs=image,
    outputs=label,
    examples=examples,
    cache_examples=False # This prevents the startup loop crash and subsequent 500 error if files are broken
)

if __name__ == "__main__":
    intf.launch(auth=("harbonk", "test12345")) # Insane placeholder auth system I added via HF
This way, you don’t have to clone down the entire repository and install a bunch of insane packages to play around with the model. You can just go to the HuggingFace space (which I’ve made public), upload your own images, and have it make predictions. Even better, you can come right here to this website and use the model on this portfolio, instead of having to create a HuggingFace account in the future. I could go so far as to generate custom JavaScript to customize the appearance of these embeds, but there’s nothing wrong with the way they look now. # Next Steps Section currently in progress. Please check back later. I’m currently attempting to design custom CSS/JavaScript for at least the painting classifier model. If this falls through, turns out to be a huge bother, or goes on for much more than a few days, I’ll switch away and move onto the next unit in the fast.ai course. My plan is to also output additional insights into the predicted artist, instead of just classifying the image, so the model is a bit more useful.
Stay tuned for further updates on the models, which will be posted right here on this blog! And don’t forget to check out my primary portfolio site, discordantharmony.com for higher-level updates on everything else.